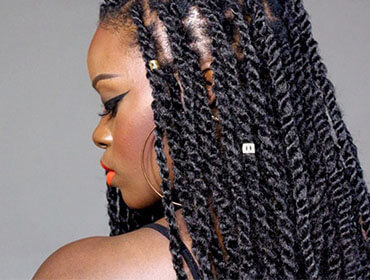
Marley twists may seem like a mammoth task if you have never tried them before but trust us it is not! Even though it may be a little time consuming, it is an incredibly simple process. This protective hairstyle if done correctly can last up to weeks. Learn how to create this glamorous hairstyle here.
1. Pick The Right Hair Extension
Marley twists can be created by using a specific type of hair extensions. Choosing the correct extensions will make your styling process easier and smoother. Invest in Darling Natural Twist Braids as they are of good quality and will help your style look chic and last longer.
2. Washing And Drying
Before installing the hair extensions, wash your natural hair with a cleansing shampoo and moisturise it with a leave-in conditioner. This will help you avoid frizz and make the installation process quick and easy. Don’t forget to detangle your hair with a wide-toothed comb.
3. Separate Your Hair Into Sections
Divide your hair into various sections, starting from the nape of your neck, all the way to your forehead. Secure each section with a bobby pin. Apply some hair gel to give your hair a little extra hold.
4. Install Darling Natural Twist Braids
Pick up a section of the extensions, bend it in a U-shape and start intertwining the two strands with your section of natural hair. Twist it all the way until the end and wrap the loose ends securely. Repeat this process with all the sections all over your head.
5. Care And Maintenance
Your Darling Naural twists are ready! Make sure you provide them optimum love and care. Washing your hair with spray bottles, applying hair oils and leave-in treatments will help you maintain this protective style for a longer period.
Protective hairstyles are fabulous but maintaining them is of prime importance. Check out Protect And Slay That Style to learn the best way of maintaining your protective style.
