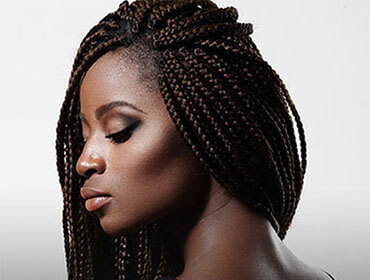
Image Courtesy: latestafrican.com
Box braids are among the most sought-after protective hairstyles, not only because of how stunning they look but also because of how well they protect your natural hair. Before you begin, decide how thick your want your braids. The finished look is stunning and will last you for months.
1. Prep Your Hair
The first step to getting box braids is to detangle any knots in your natural hair. Detangling hair post washing will lead to damage and breakage, which is why it’s best to work with dry hair. Next, wash your mane with a sulphate-free moisturizing shampoo to ensure your hair is clean and fresh. Deep conditioning your hair with a moisture-rich hair conditioner is vital to ensure that your hair is frizz free. Run a hydrating leave-in conditioner over the ends of your hair.
2. Divide and Conquer
Part your hair into four equal sections. Divide each section into smaller sub-sections, depending on the desired thickness of the braids. This will leave you with little box-shaped sub-sections. Divide each box into three strands, braid these strands from root to tip. Work in a good quality extension, such as Darling Superstar Braid. Don’t make these braids too tight, as this can strain your natural hair. Continue this procedure for the other sections as well. Secure the ends of the braids with elastics.
3. Tame Flyaways
Trim flyaways with a sharp pair of scissors. This will ensure that the thickness of the braid does not thin out at the end and is consistent all throughout. You want your braids to look uniform and smooth.
4. Seal In The Moisture
Dip the ends of the braids in hot water to efficiently seal them, preventing them from unravelling. You can now do away with the elastics. Spritz a moisture-rich sheen spray to form a protective layer. This will act as a shield, and protect the braids from dirt and pollution.
For inspiration on how to style your box braids, learn how you can Raise The Bar With These Edgy Cornrow Styles.
